Drupal CMS – A new tool for marketers, designers, and content creators
This blog post is more than 12 months old and may be out of date.
On January, the Drupal CMS version 1.0.0 was released. At first glance, the version number might seem confusing, as Drupal has been around for over 24 years. That’s exactly what makes this release exciting! Until now, Drupal has been more of a framework for managing complex websites rather than a traditional content management system (CMS). However, the new direction aims to create a user-friendly CMS specifically designed for marketers, designers, and content creators.
The upcoming version, Drupal Experience Builder, promises not only simpler content management but also an improved user-friendly design experience for web pages and their content. Early tests indicate that this approach is highly promising. Since Drupal CMS is not (yet) available for direct installation via Zone+, I have prepared a step-by-step guide on how to install it on a Zone platform.
Installing Drupal CMS on a Zone Platform Server
1. Create a MariaDB Database and User
Before starting the installation, you need to create a MariaDB database, where your website’s data will be stored. Additionally, you must create a MariaDB user with full permissions to manage the database. You can find detailed instructions on how to create a MariaDB database and user in the Zone support center.
2. Configure the Web Server
Next, the web server must be configured to serve files from the correct directory. Drupal CMS’s front controller is located in the web subdirectory within the project’s root folder.
Example: If your project is called website, set the web server’s root directory as: website/web
This setting can be configured via the virtual server’s main domain or subdomain management panel. The PHP version in use is 8.3, and the example domain is: drupal.miljonivaade.eu
3. Enable SSH Access
Since Drupal CMS is installed using Composer, PHP’s package manager, SSH access to the server is required.
4. Install Drupal CMS on the Server
Navigate to the appropriate directory on the server according to your web server configuration:
cd ~/domains/www.drupal.miljonivaade.euCode language: Bash (bash)Run the following command to install the required files:
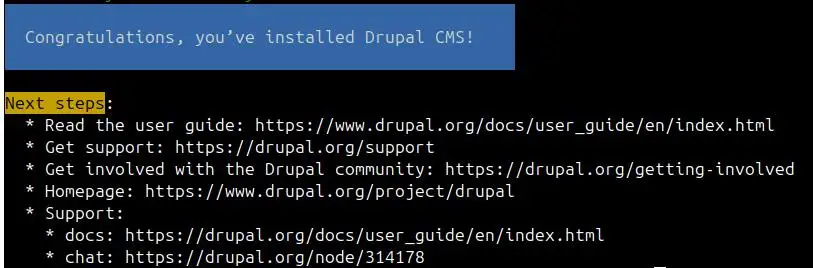
composer create-project drupal/cms websiteCode language: Bash (bash)If everything is set up correctly, the output should look similar to the example provided.
Next, open your browser and go to your chosen domain (e.g., https://drupal.miljonivaade.eu). Here, you will need to complete a few final setup steps.
Finalizing Drupal CMS Installation and Configuration
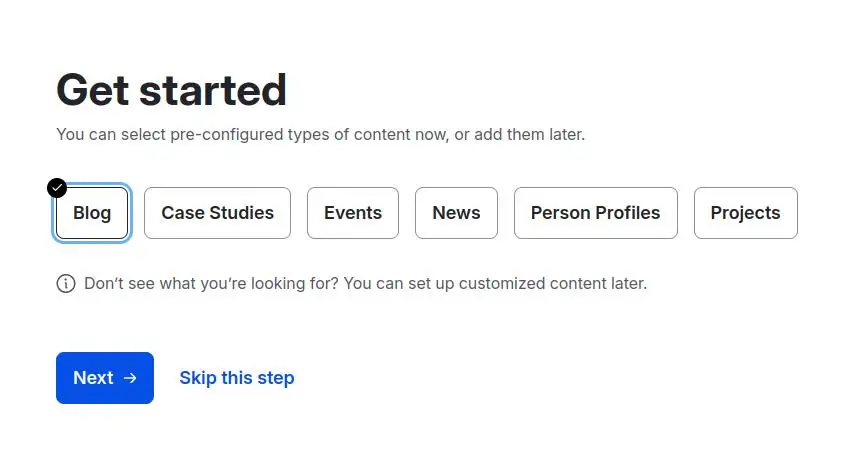
1. Choose Content Types
The first step allows you to select the content types you will use on your website. Based on your selection, Drupal will determine which modules to enable in the management interface.
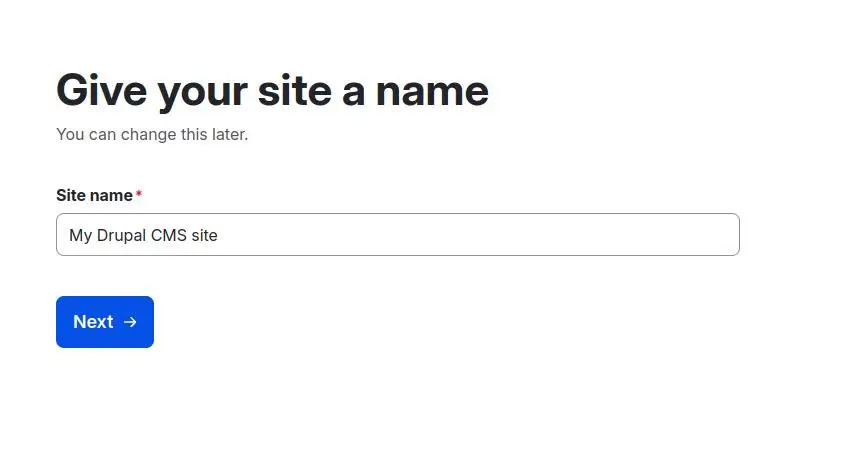
2. Set Your Website Name
Enter the desired name for your website, which will be displayed to visitors.
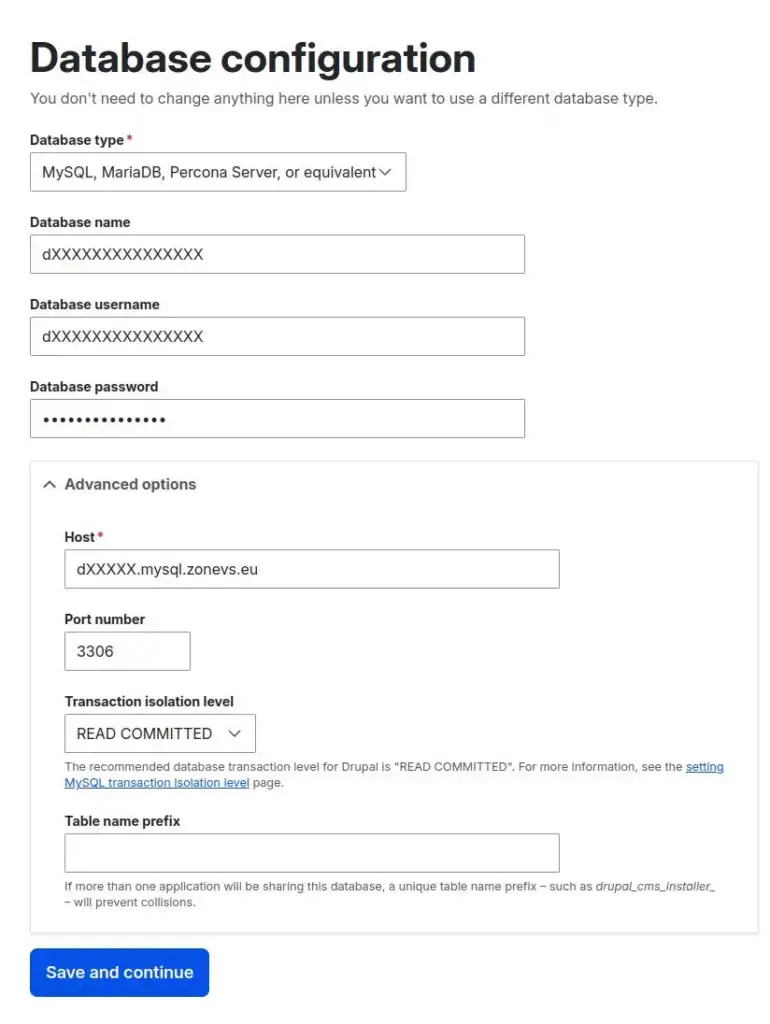
3. Configure the Database
Next, you must enter your database settings.
Select one of the following database types:
- MySQL, MariaDB, Percona Server, or an equivalent.
Provide the database name and user credentials you created earlier. In the Advanced Options, you must also specify the Host, which you can find in the virtual server management panel under System Information. Use the MySQL/MariaDB server address displayed there.
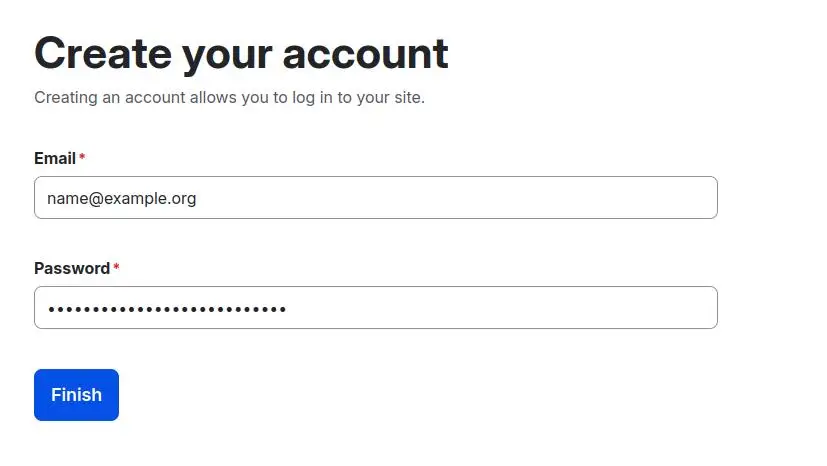
4. Create the Admin User
Click Save and continue, and then set up the first administrator account.
Important:
- Even though you enter an email address, the admin username will always be “admin”.
- Use a strong password to ensure the security of your website.
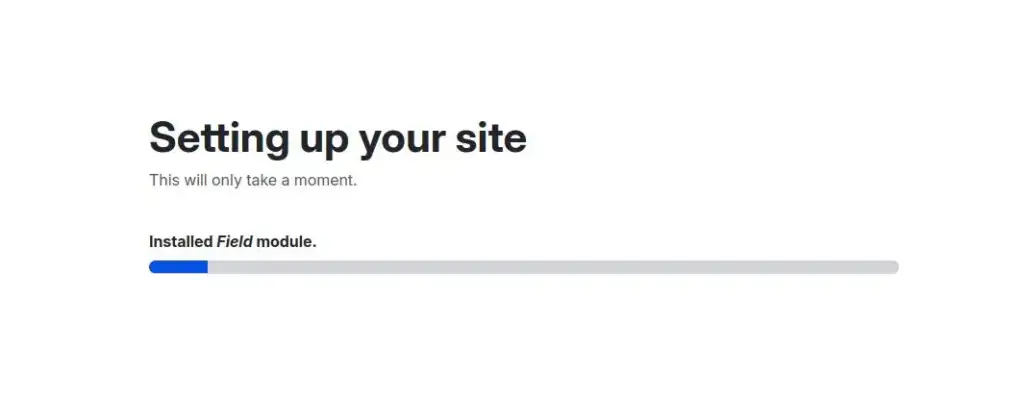
5. Complete the Installation
Click “Finish”, and Drupal will begin installing and configuring the website. This process may take a few minutes, and progress will be displayed on the screen.
First Login and Admin Panel Access
Once the installation is complete, you will be redirected to the Drupal CMS admin panel, where you can manage your website’s content.
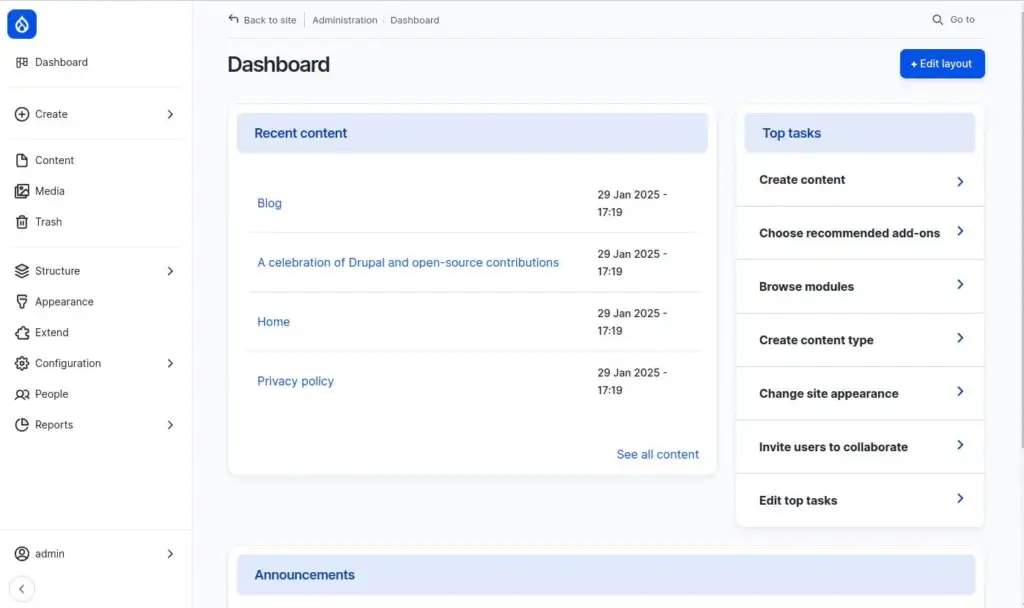
Navigating the Drupal Admin Panel:
- Click the Drupal logo in the top left corner to enter the visual editor, where you can add, modify, and remove design blocks.
- Adding new pages or blog posts: Select “Create” from the left-hand menu.
Logging in Next Time
If you log out of the admin panel, you can log back in by adding /admin to your website’s URL.
(e.g., https://drupal.miljonivaade.eu/admin).
For more detailed instructions on using Drupal CMS, visit the Drupal CMS knowledge base.
Why Choose Drupal CMS for Marketers, Designers, and Content Creators?
The new version of Drupal CMS represents a major step toward a more user-friendly content management experience. It introduces visual design tools that were not available in previous versions, making it a strong competitor to WordPress and other CMS platforms.
Drupal CMS is ideal for:
Marketers – Powerful tools for managing campaigns and content strategies.
Designers – Extensive customization options without coding.
Content Creators – A smooth and intuitive way to publish content visually.
Popular posts

Blocklist: why does the computer say no?

Protect your brand online: why one domain may not be enough

.NO domain now at Zone – is your business ready for the Norwegian market?